Rider’s Guide to Motorcycle Pre-Trip Inspections
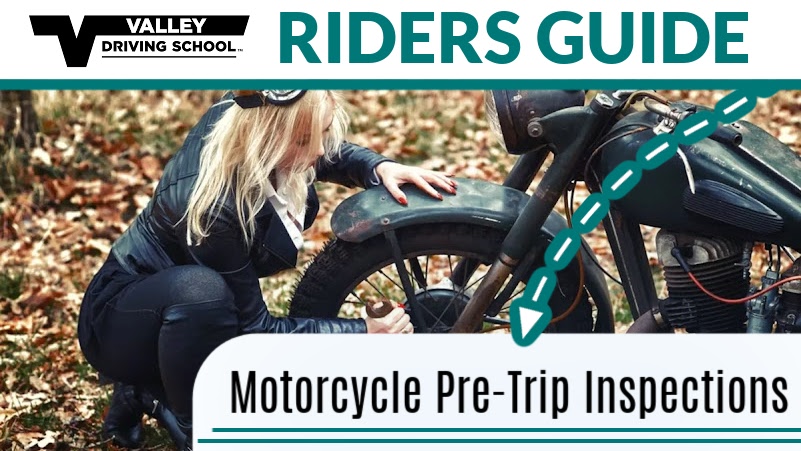
Even if you’re in a hurry to hop on your motorcycle and hit the road, you still need to conduct a pre-trip inspection to ensure it’s safe to operate. We’re here to help you feel safe while having fun – read on to learn how to conduct your pre-trip inspection on your bike!
We’re breaking down the motorcycle pre-trip inspection so you know what to look for before you hit the open road.
Tires & Wheels
Start the motorcycle pre-trip inspection with the tires and wheels. Properly maintained and inspected tires are essential for safe riding! Complete a visual overview, looking for any signs of damage like cuts, punctures, or cracks. Look over both the tire tread and sidewalls, and make sure there are no nails, screws, or other objects stuck anywhere. Having a patch or repair kit in the saddle bags is a great idea, even if you’re just using your bike for a short commute.
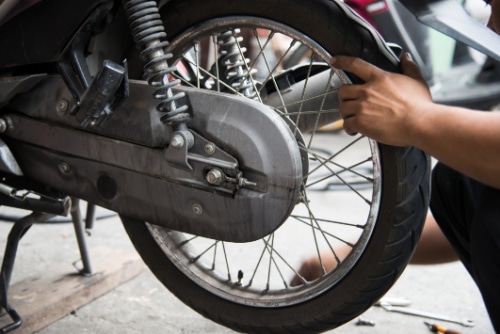
Once you’ve confirmed that the tires are in good condition, check the tread depth. All motorcycle tires are outfitted with a wear-bar that tells the rider when it’s the opportune time to replace them. You should also make sure that the tires are properly inflated. Use a reliable tire pressure gauge to check them, and refer to the owner’s manual or a sticker on the motorcycle frame for the recommended tire pressure. Avoid underinflating or overinflating the tires, which can affect the handling, stability, and tire wear.
If you’ve got wire spoke wheels, be sure to check that all spokes are intact. If you have mag wheels, check them for any dents or damage. You should also check the wheel alignment, which you can do by seeing if the wheels are straight and aligned with each other. Misaligned wheels can affect the stability and handling of the motorcycle.
Lights & Signals & Mirrors
The lights and signals on a motorcycle are a crucial part of the pre-trip inspection as they allow you to communicate, see, and be seen! Your motorcycle pre-trip inspection should include checking the headlights, high beams, turn signals, brake lights, and tail lights. Turn on each set of lights to make sure the bulbs are working properly and emitting enough light. You should also check that the light casings are not cracked, broken, or retaining moisture. Watch for the easily missed lights as well, like the licence plate light, instrument panel lights, and any additional lighting accessories you may have.
The mirrors are another critical part of the motorcycle pre-trip inspection, as they provide you with a fair amount of information and visibility while riding. When checking your mirrors you’re looking for positioning and functionality. Check the functionality of your mirrors by ensuring they are tightened securely and do not vibrate or wobble. The mirrors should also be clean and free of scratches, cracks, or loose mounts.
To position the mirrors correctly, sit on the bike in your normal riding position and adjust the mirrors so you have a clear view of the road behind you without having to strain or move your head too much. They should provide a clear and unobstructed view of the area behind you, including the lane you’re traveling in and the adjacent lanes on either side of you. Ensure the mirrors cover a wide enough area to allow seeing any approaching vehicles and potential hazards, with as little blind spots as possible.
Drive System
The drive system will be either a chain drive or a belt drive, and no matter which style your bike has, it’s just a quick minute to check and make sure they are both running properly.
For chain drives, the tension can be checked by gently pressing on the middle of the chain with your finger. It should have a slight amount of play, as being too tight or too loose can affect the bike’s performance and cause premature wear. The front and rear sprocket teeth should not be bent or damaged, or show any excessive wear and tear. The alignment of the chain should also be checked, and it should run straight and parallel to the rear sprocket. The chain itself should be clear of rust, damage, or kinks, and should be properly lubricated and clean.
For belt drives, the tension can be checked by gently pressing on the middle of the belt with your finger. The tension is determined by the manufacturer’s recommendations, and having the tension set incorrectly can affect the bike’s performance and cause premature wear. The belt itself should be free of cuts, fraying, or excessive wear.
For shaft drives, the drive system is in an enclosed housing which you will not be able to access during a motorcycle pre-trip inspection.
Clutch & Brakes
To ensure the clutch is moving smoothly you should check the clutch lever play, the engagement and disengagement, and clutch drag.
The clutch lever play can be checked by starting the bike and letting the engine idle. Pull the clutch lever fully towards the handlebar and release it slowly. While it releases, observe the amount of movement before you feel resistance. If there is too much or too little, it may need to be adjusted.

The clutch engagement and disengagement can be checked by letting the engine run while in neutral. Pull the clutch lever fully towards the handlebar once more, shift into first gear and then slowly release the clutch lever while gently applying the throttle. Your motorcycle should move forward smoothly without stalling, indicating that the clutch is engaging properly. Pull the clutch lever again and shift into higher gears, repeating the process to check smooth engagement and disengagement for all gears.
To check for clutch drag, put your bike into neutral again with the engine running. Once more, pull the clutch lever fully towards the handlebar and attempt to shift into first gear without applying any throttle. The motorcycle should not move or resist, but if it does this may be indicative of clutch drag.
While your motorcycle engine is idling, you can also check the brakes. Check the brake lever and pedal for a slight amount of free play. If there is too much or too little free play, it may affect the brake engagement. Put the bike into neutral and apply the front brake lever and rear brake pedal separately. They should both feel firm and not excessively loose. The brake pads should also be visually inspected, if you can see them through the brake calipers or inspection windows, for any signs of excessive wear.
Fluids
Staying in line with checking the brakes, the first fluid check you can make is the brake fluid. The brake fluid should be at the recommended level and should not be discoloured, contaminated, or show any signs of moisture. Engine oil should be checked for an adequate level, and it should be clean and free of any contaminants. The same can be said for coolant/antifreeze, as well as transmission/clutch fluid.
You should also check your fuel level, and the fuel tank itself for any leaks or damage. Not all motorcycles have a fuel gauge, so you may need to physically open the gas tank to check for an adequate amount of fuel. Depending on your specific motorcycle, you may have other fluids that need to be checked: fork oil, final drive oil, or power steering fluid may be applicable
–
The first time you go through a motorcycle pre-trip inspection it may seem like there are too many items to remember and look at, but the entire process should only take a few moments. Pre-trip inspections are a fundamental part of formal motorcycle training, so if you are unsure about all the checks consider enrolling.
During the motorcycle pre-trip inspection, if you find any components you’re not sure about, make sure to take your bike to a certified mechanic to have it looked over professionally. When you’re completing a pre-trip inspection before every ride it will become second nature, just like gearing up before you hit the road!
Related Articles
Drivers Guide to Safe Driving with Full Self-Driving in BC
Driving a modern vehicle equipped with automated driver support? Discover the smart driver habits that keep you effortlessly in control of your high-tech ride.
Drivers Guide to Emergency Vehicle Right-of-Way Rules in BC
Sudden sirens wailing behind you? Master BC's emergency vehicle right-of-way rules, like intersection protocols and the "Slow Down, Move Over" law. Read on to stay calm and safe!

BC Dashcam Guide 2026
BC dashcam guide for 2026: legality, safe mounting that won't obstruct your view, privacy basics, and top dashcam picks for BC drivers.
