
We all know that familiar sound. You’re cruising down the highway, enjoying a relaxing drive, and suddenly, you hear the loud bang as a rock hits your windshield. Upon further inspection, you’re dismayed to see a distinctive rock chip in your previously pristine glass.
Before you shell out hundreds of dollars on a repair or try and wait, but the crack spreads and you need a new windshield, you may be able to fix the repair yourself or at least stop the spread of the crack. In this week’s blog post, we’re going to guide you through repairing a chip yourself!
While it can be a fairly simple process to repair the chip yourself and shouldn’t take more than an hour or so, you must follow all the steps and instructions included in your kit. We also recommend approaching this task with a healthy dose of patience – it requires careful, detailed work and a steady hand. If you feel uncomfortable or if you’re worried about making it worse rather than better, it’s okay to leave this job to the professionals. Some insurance coverage even provides free chip repairs and some places, like Canadian Tire, offer quick chip repair from their parking lots! Remember that the best advice you can get in regards to vehicle maintenance and repairs is a qualified professional.
To determine whether or not your windshield crack can be a do-it-yourself job, check out its size first to be sure. If it’s smaller than a quarter, you should be able to tackle the repair at home.
You’ll need to purchase an epoxy resin windshield repair kit from your local automotive store. Some kits may differ from the instructions we’ve included below, so it’s always important to read and follow the manufacturer’s directions.
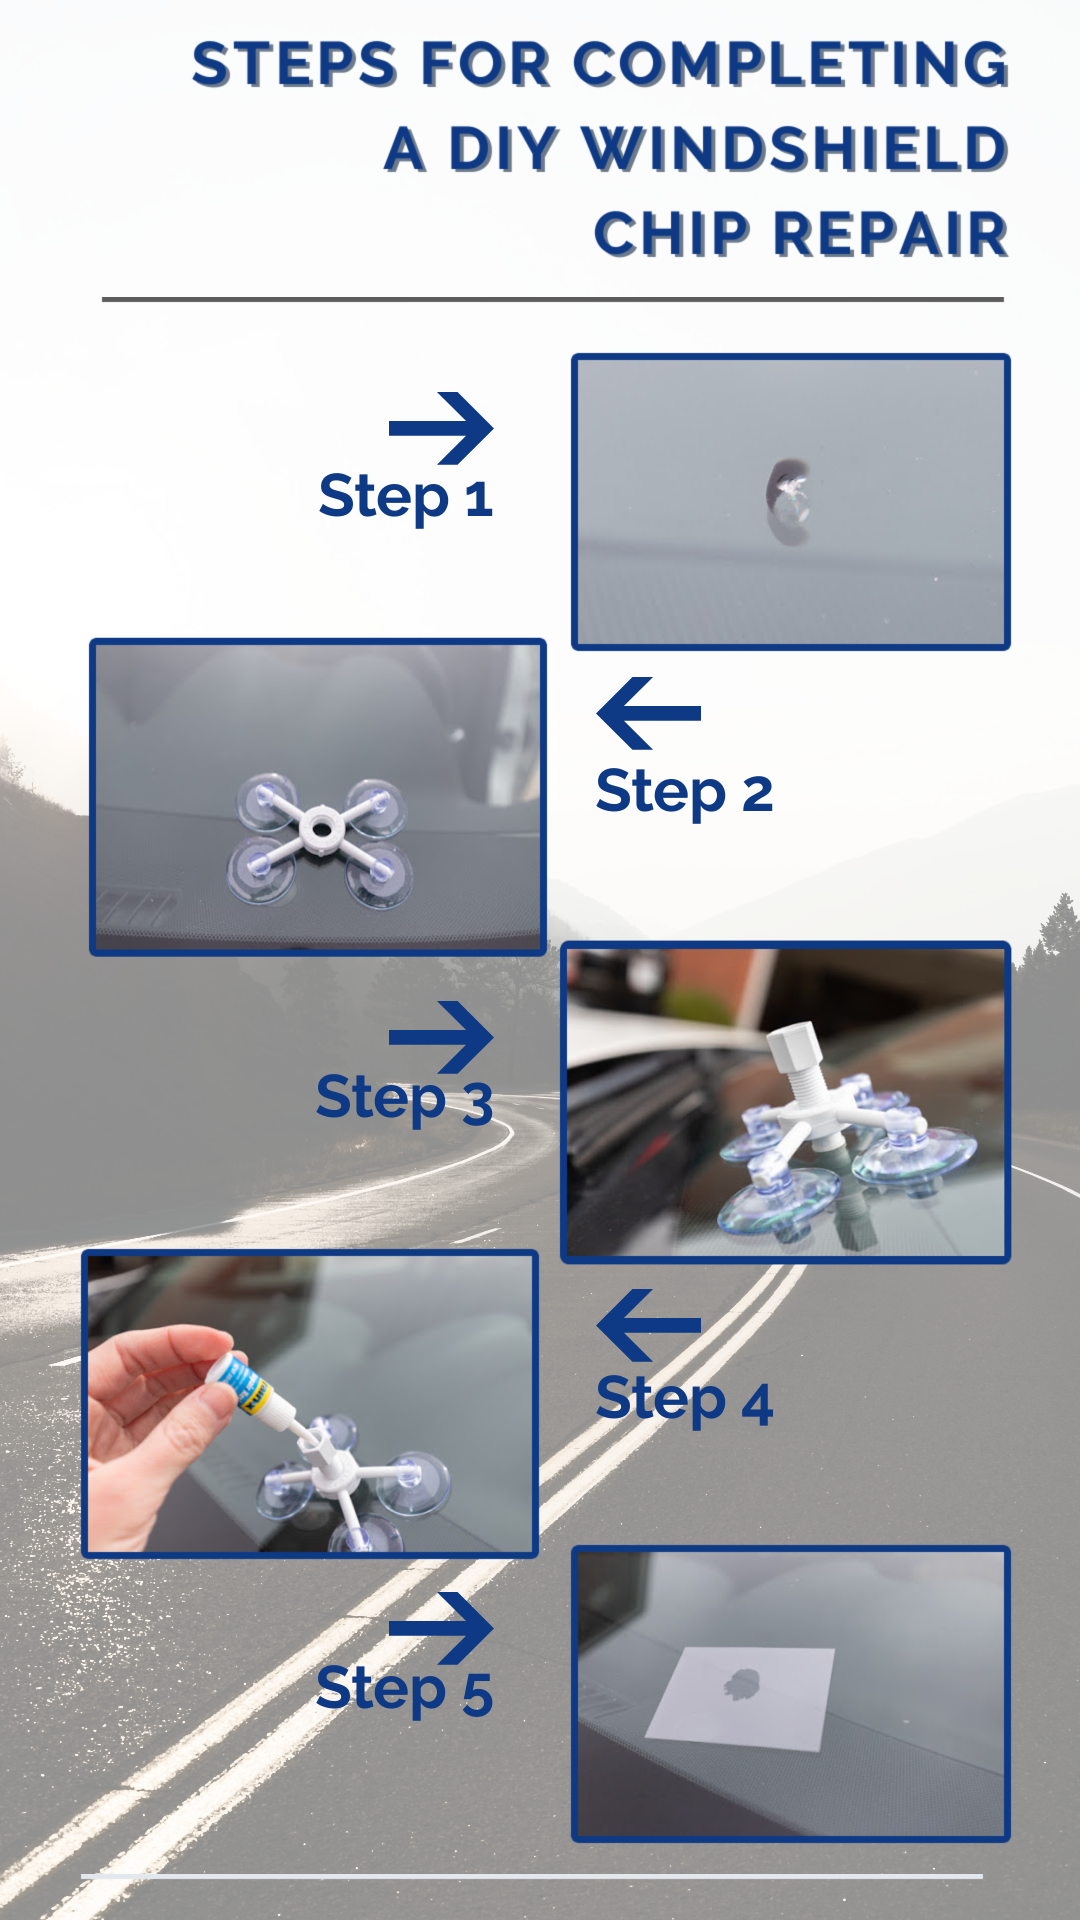
Before you start, make sure the chipped part and surrounding area of your windshield is clean. Use an alcohol pad to clean out any debris or film from the glass.
Measure your patch adhesive and pedestal against the size of the crack. Ensure that your patch adhesive is larger than the circumference of the crack. Next, fill the pedestal with the epoxy resin provided in the kit. Fill it all the way to the top and ensure there are no gaps.
Push the plunger on the syringe all the way down and insert it into the pedestal. While holding the pedestal in place with one hand, draw up on the plunger slowly to draw air bubbles out of the resin. Leave the syringe in place until you no longer can spot air bubbles in the chip.
Remove and re-insert the syringe, pressing down on the plunger to push the resin into the chip. Be sure not to press too hard, or you’ll risk breaking the seal of the adhesive.
Wait for the resin to cure fully and then remove the syringe, pedestal, and adhesive patch. Place a few more drops of resin on top of your newly formed seal and place the curing strip over top. Finally, use a razor blade to gently scrape from top to bottom to remove any last air bubbles.
Be very careful removing the curing strip so you don’t pull any resin off the glass with it. Use the razor blade once more to scrape any last remaining extra resin from the surface of the glass.
In order to set yourself up for success, be sure to buy a quality repair kit. Don’t rush the process, and don’t cut corners when it comes to sealing and curing times. Watching videos of the process on Youtube can help you visualize the steps you need to follow, and how to carry them out properly.
--
If your windshield chip is too large to repair at home or the crack begins to spread, it’s important to get your windshield looked at and/or repaired by a professional. A damaged windshield can be a safety hazard for the occupants of your car and can cause important technology like blind spot detection and can alter the structural support of your vehicle.